
You may have noticed that your laptop or desktop is bound to slow down over time, which slows down our workflow. If your laptop or desktop has Windows 11, and If you’re one of those people who wants to make their Windows 11 laptop or desktop run a little faster, you need to pay attention to this. The system gradually slows down, the battery drains quickly, and the RAM appears to be constantly full. One major reason for this is that the system may slow down, and the battery may drain quickly. background apps Background apps running without your knowledge Keeps using system resources.
Table of Contents
There’s nothing to worry about. You can easily fix this from the comfort of your home using your system settings. Today, we’ll explain in great detail how to disable Windows 11 background apps permanently, so your system can become lighter, faster, and more battery-friendly. And it can help you improve your work. If a friend or family member has encountered a similar problem, please share the link to this blog with that person.
What are background apps?
Well, let us know what are background apps? Whenever you install an app, whether from the Microsoft Store or from a third-party website, many of those apps have permission to not use your system but keep running in the background.
Let me give you an example, please read it. For example, the Mail app constantly checks for new emails in the background, the News app keeps sending notifications, and many third-party apps remain constantly active in the background under the guise of auto-update or sync.
Background apps What harm does this cause?
There are many disadvantages of these background apps.
- Laptop or desktop RAM and CPU usage increases Due to which other apps run slow.
- The battery starts draining quickly.This is a big problem especially for laptop and tablet users.
- Data is also wasted Happen, If you use a mobile hotspot or a limited data plan
- It also affects the startup speed of the system.
- So let us now know how to permanently disable them. What are the different methods?
Method 1: Disable Background Apps from Windows Settings
You can close background apps using this first method.This is the easiest method, which Microsoft itself has provided in Windows 11.
See step by step process
- First of all Start Menu Open and Settings Click . Or press the Windows + I shortcut.
- Now in the left panel Apps Click on the option
- Then Installed apps Click on it, here you will see a list of all the apps installed on your system.
- Click on the three dots (…) next to any app you want to stop from running in the background and Advanced options Select
- Scrolling down here, you will find “Let this app run in the background” You will get the option of
- This toggle Off do it
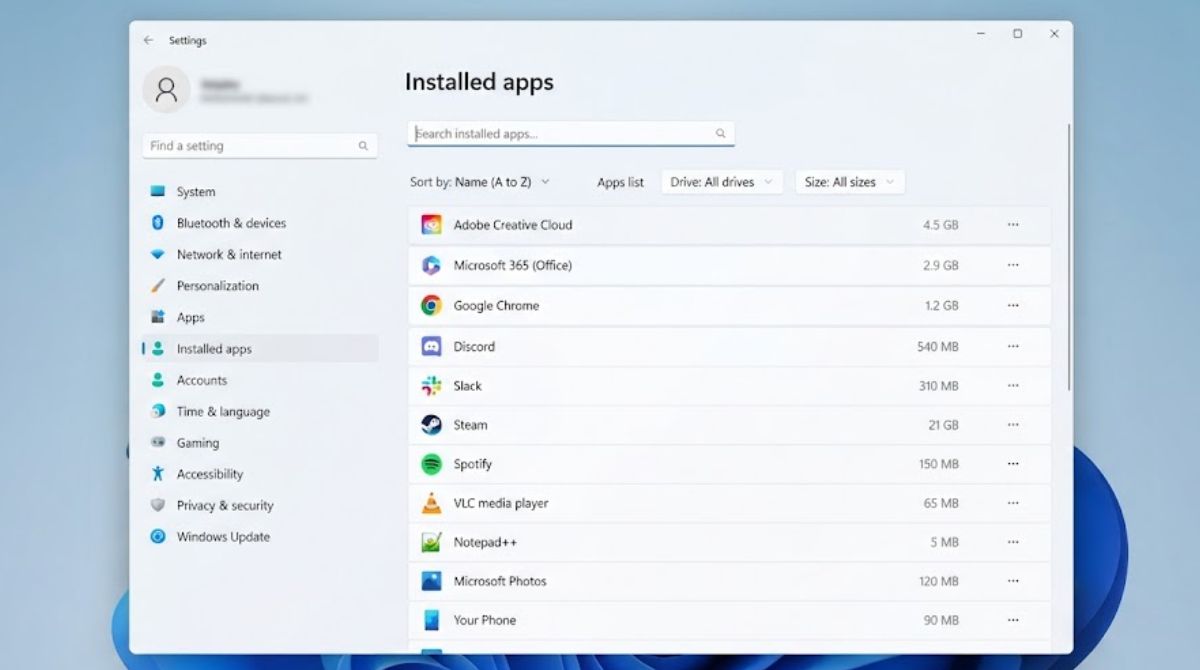
Image Source: Windows 11 UI
Repeat this process for each app you want to close. This takes a little time because each app needs to be closed individually. This is the safest method as it won’t disrupt any system functions.
Method 2: Control Background Apps from Battery Settings
If you are a laptop user then this method will prove to be very useful for you.
Read More:
- What is the difference between Bluetooth, Wi-Fi and 2.4G wireless devices?
- What is the difference between Bluetooth, Wi-Fi and 2.4G wireless devices?
- Wired vs Wireless CarPlay: What’s the difference and which is better?
How to do
- Open Settings and System Go to
- Power & battery Select the option
- Here Background apps You will find the section, click on it
- Now you will see two options (Let Windows manage my background apps) and “Manage background apps yourself”.
- Select the second option and manually turn off the toggle next to each app
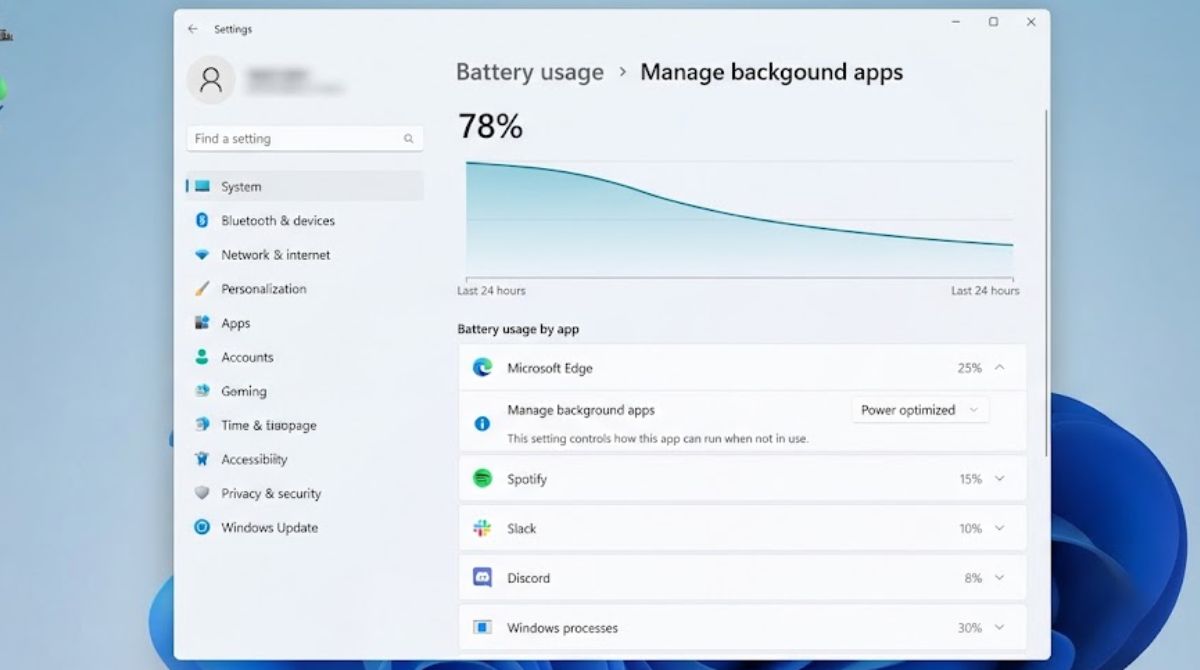
Image Source: Windows 11 UI
The advantage of this method is that it allows you to control all your apps in one place, without having to go into each app individually.
Method 3: Disable Startup Apps from Task Manager
Background apps are often actually startup apps—those that launch automatically upon system boot and then continue running in the background. You can fix these problems using the methods below.
The process is like this
- on the keyboard Ctrl + Shift + Esc Open Task Manager by pressing
- given the above Startup apps Click on the tab
- Here, each app shows its “Startup impact” High, Medium, or Low
- Right-click on an app with a High Impact rating that you don’t need and select Disable Select
This method is especially effective for apps that start unannounced as soon as the system starts.
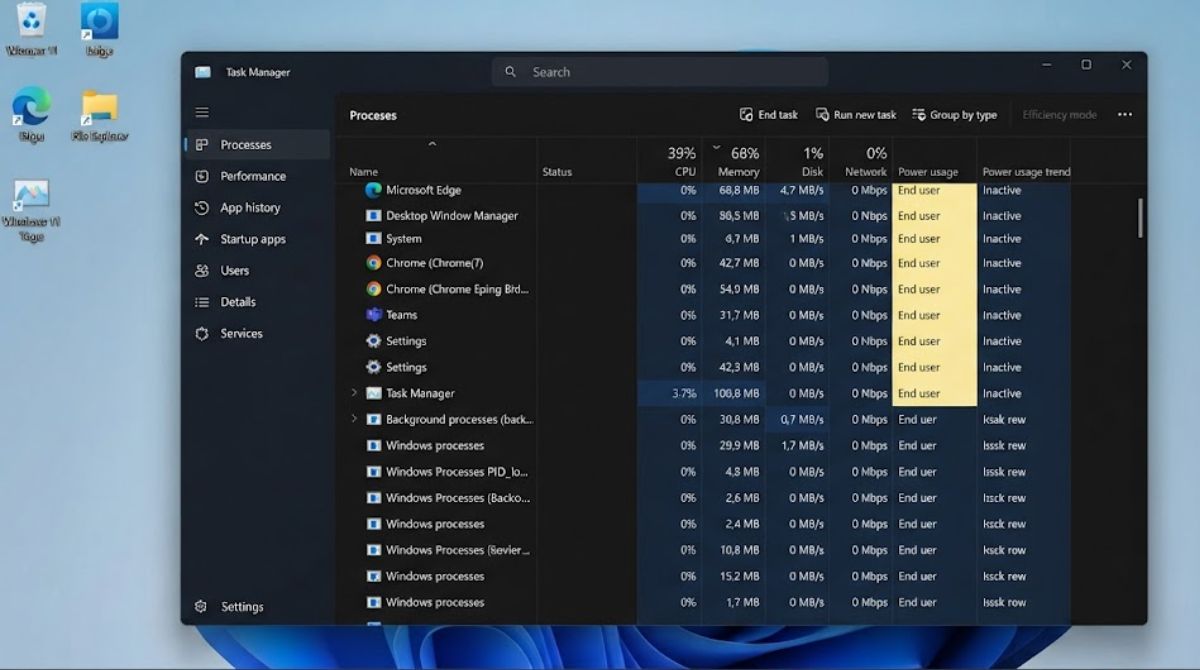
Image Source: Windows 11 UI
Method 4: Permanently Disable it from the Group Policy Editor
This is a slightly advanced process for advanced users.If you want to completely and permanently disable background apps, and prevent any settings from accidentally turning back on, you can use the Group Policy Editor. Note that this feature is only available in the Windows 11 Pro, Enterprise or Education Version, not the Home version. Therefore, if you have the Home version, avoid this method.
- To open the Run dialog box Windows + R Press
- Type gpedit.msc and press Enter
- Now go to this path: Computer Configuration > Administrative Templates > Windows Components > App Privacy
- Here you “Let Windows apps run in the background” You will find a policy named, double click on it
- This Enabled and in the dropdown below “Force Deny” Select the option
- Apply and the system Restart do it
With this setting, no Windows Store app will be able to get permission to run in the background, no matter what you change.
Read this for caution
You have to understand that When making changes in the Group Policy Editor, keep in mind that these are advanced settings. Changing the wrong policy instead of the correct one could cause system problems. Therefore, be sure to review the changes carefully before making them. System Restore Point It is better to make it.
Method 5: Disabling it from the Registry Editor
If you haveThose who have Windows 11 Home edition and can’t find the Group Policy Editor option can use the Registry Editor. However, this method can be the most risky. So, proceed with caution and be sure to back up your Registry first.
- Windows + R by pressing regedit Type
- Go to this path:HKEY_LOCAL_MACHINE\SOFTWARE\Policies\Microsoft\Windows\AppPrivacy
- If AppPrivacy folder is not there then create a new one Right Click > New > Key
- a new one inside DWORD (32-bit) Value Create and name LetAppsRunInBackground
- its value 2 Set this equals “Force Deny”
- Restart the system
What to keep in mind after disabling background apps?
After closing background apps, it is important to keep some things in mind so that none of your important work gets affected.
- If you want notifications from an app, don’t completely disable that app from running in the background.
- Never disable antivirus or security software from the background, this may affect the security of the system.
- Think twice before turning off sync services like OneDrive, or your files will stop updating.
- Check your settings every few months, as Windows updates sometimes reset them.
Benefits of Disabling Background Apps
When you close unnecessary background apps in the right way, you get these benefits.
- Increases system speed There is less load on RAM and CPU.
- Battery backup is better Especially for laptop users.
- Saves data, For mobile data or limited internet users.
- Privacy is better, Fewer apps send data in the background.
- Startup time is reduced,The system boots quickly
Conclusion
I’d love to know if you got the details. But this blog will help you find out. We have explained in detail that How to permanently disable background apps in Windows 11? Whether you use the simple Settings method, close startup apps with Task Manager, or, for advanced users, use Group Policy and Registry Editor. Each method is fine in its own way.
I like to recommend starting with the Settings and Battery method first, as it’s the safest. Only if you notice some apps are still active in the background can you use Group Policy or Registry Editor.
Changing even small settings can be beneficial for system performance. So follow these steps today and make your Windows 11 device faster and smoother than ever.
Read More: Tech News
- SK Hynix big bet: $38 billion investment will change the world of memory chips
- Apple makes a big move in China: Mac users can now use Alibaba Qwen AI
Read More: Gaming Updates